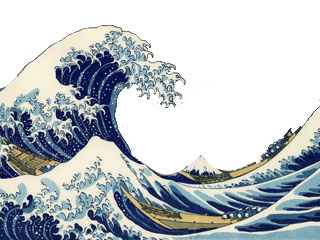
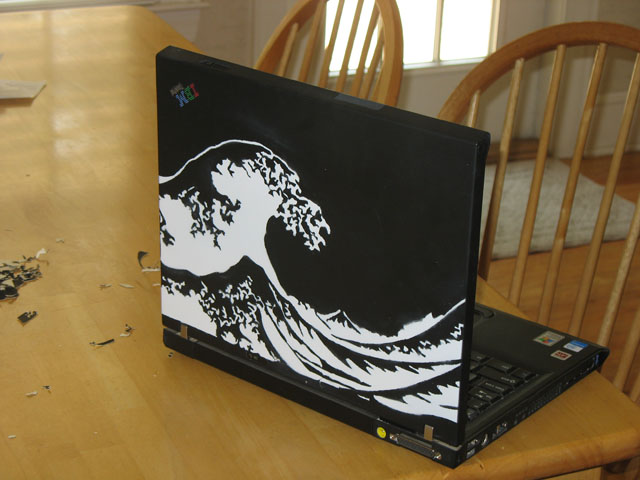
| The first thing to do is pick a graphic. Like I said, I chose Hokusai's Wave . Once you find a suitable picture, go into Photoshop or some similar photo editing program to turn it into a stencil. The first thing to do is remove any unwanted background, like the picture on the right. This helps the next step go smoothly. |  |
 |
| Now we can apply a threshold modifier to the image. In Photoshop CS, you can do Image>Adjustments>Threshold, which will convert your image into a soley black and white image. Mess with the slider until you get a stencil you like. The black part is what you cut out, and the white part forms the mask. The scattered white pixels in the black area are just artifacts of the threshold, and you can just ignore them. Also, be sure to thoroughly check the image for "islands" of white. When you cut out the stencil, any islands will just become stray pieces, connected to nothing. So, I just made sure to connect them with a thin little bridge when I was cutting, but you can paint little white bridges in Photoshop, or draw them in when you print the image. | 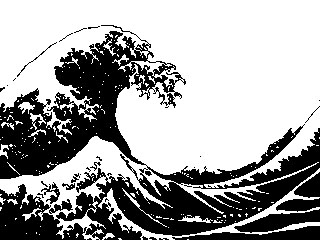 |
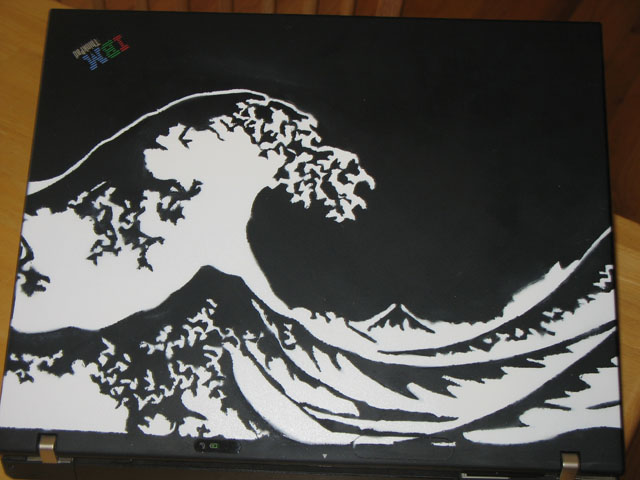
Now its time to make the stencil. Print out your picture, at the corrrect size for your computer, and tape it to a manila folder. Since it's thick and sturdy, it will withstand all the cutting and painting. Once your picture is attached to the folder, start cutting out the black portions with a craft knife. After a long while (depending on your image) all the black will be gone, and you can detach the printout from the folder. Make sure the surface is clean before you do anything to the computer. Also, it's probably a good idea to test the stencil on some scrap wood or something first. Now comes the hardest part--attaching the stencil to the laptop for painting. There's probably better ways to do this, but the best I could think of was to spray the backside of the stencil with spray adhesive and wait for about 5 minutes, until the adhesive is tacky, but not sticky. Then I lined up the stencil and stuck it to my laptop. This way, the stencil stays flush against the surface and doesn't move around. Using spray paint (spray paint for plastics would probably be best), spray over the stencil (make sure you mask anything you don't want painted) using light coats, and going evenly. Do that a couple of times until you have nice solid color on your computer. Wait for the paint to completely dry before removing the stencil. Then observe the beauty you've created! After a while, the paint will probably start to scratch off, but not if you take care of your computer and used plastic spray paint. To make multicolored pictures, make separate stencils for each color, and when you paint the computer, do one color at a time, making sure to mask other parts and line up everything else. |
 |
|
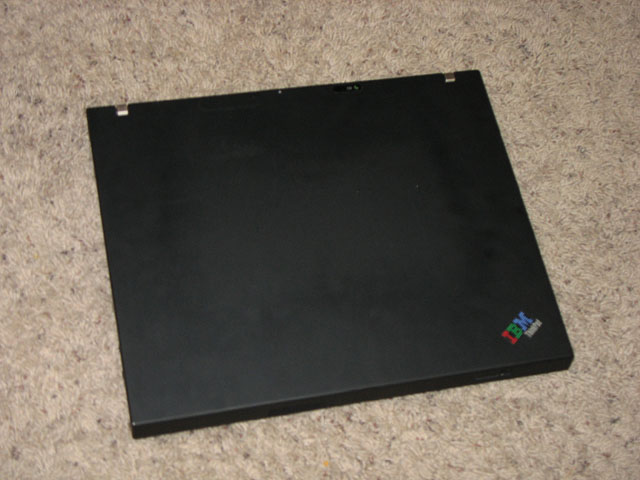
| Once I got bored of the Wave on my laptop, I wiped it off with some sort of rubber cement thinner, but any noxious thinner should work, so long as it doesn't melt the laptop plastic. I had access to a lasercutter, which made cutting the new stencil much easier. After the new stencil was made, the spraypaint procedure was pretty much the same. Now, I have a brand-spankin new design on my laptop. I'm not actually sure where it's from, so if it's yours and you want credit, drop me a line. | |
 |
 |
| I may add the concentric circles later, but for now this is it. I'm happy with the way it turned out--it's a lot cleaner than the hand-cut stencil, but there was still some overspray from the painting. | 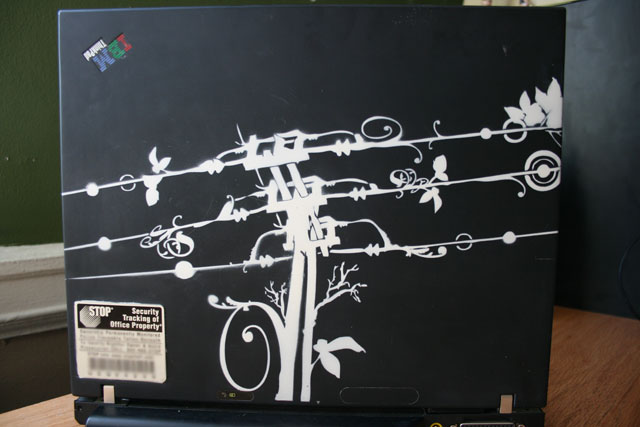 |
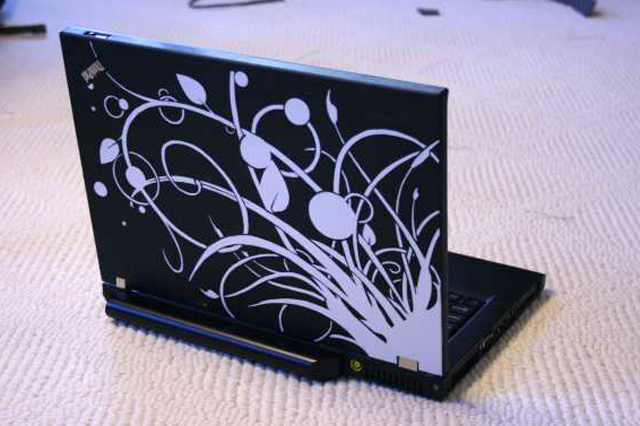
Update 12/29/2009A new laptop and a new design. Here's my latest laptop decoration, and this one is on a Thinkpad T400. I made the design by myself in Adobe Illustrator with some foliage brushes and circles. I cut this stencil out by hand, and adhered the stencil to my laptop using a glue stick I found made by 3M called a Scotch repositionable glue stick. This glue works like the glue on the back of Post-it notes, in that it makes a non-permanent bond to things. It worked better than the 3M spray adhesive, as there were no rubbery, gluey strands that bridged small gaps and filled holes, but there were a few regions of overspray. Nail polish remover worked great for cleaning up any stray paint. |
 |