This page details my conversion of an old Dell Inspiron 8000 into a digital picture frame to display all my photographs. There are many digital frames out there, but most of them are outrageously expensive and have tiny screens. My frame, on the other hand, will have a comparably massive 15" screen! The basic concept is simple: remove all uneccessary components from the computer, fit it all in a minimally deep frame, and get the computer to display your images.
Prepping the Computer
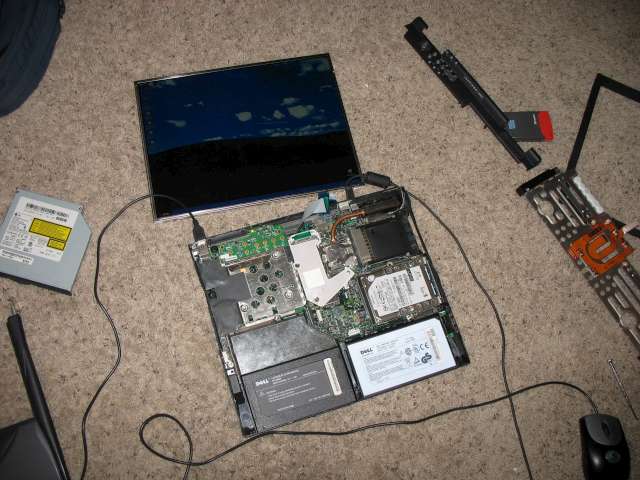
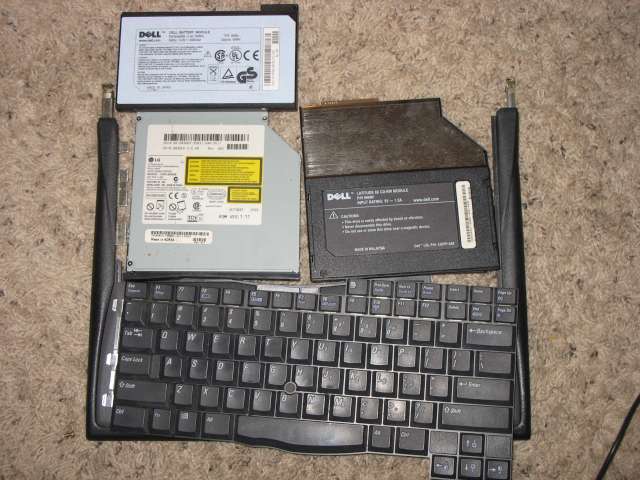
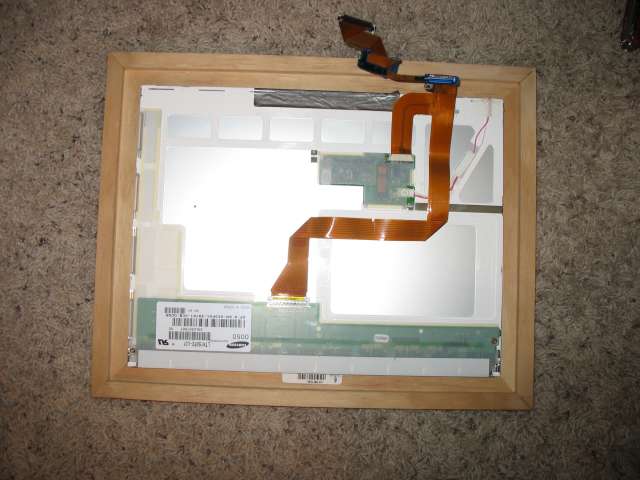
The first step was to gut the computer. If I wanted it to fit inside a fairly thin frame, I had to remove all the ungainly plastic pieces, as well as many of the "useful" parts. This was probably the easiest (and maybe the most satisfying) part of my frame project. With all the plastic bezeling off, the computer does look rather...naked, but at least it's smaller. I actually ended up removing most of the internal components. CD-ROM? Who needs it? Keyboard? For what? Hard drive? Nonsense...er..nevermind. I removed the CD-ROM (both of them), keyboard, speakers, network card, trackpad, and battery. That sure slimmed er up a bit. All that was left now was basically a motherboard, hard drive, and monitor--perfect for displaying pictures. Actually, in my frame's early life, it still had some of the extraneous plastic, namely the bottom plastic bit everything was bolted down to. It turned out that it wasn't needed after all, and I removed it later on. |
|||
|
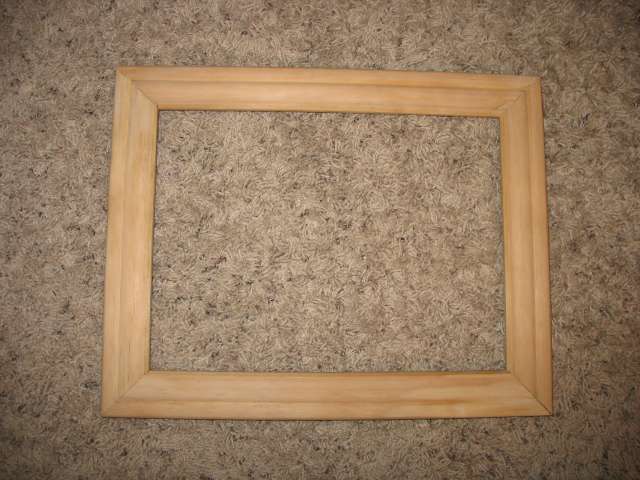
Making the Frame
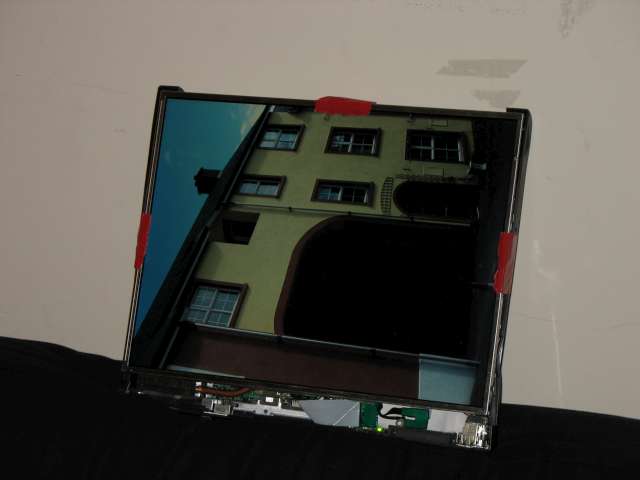
Now I had a rudimentary computer, but it still didn't look quite like what I had imagined. Reorienting the screen so it sat on top of the main computer body (imagine a laptop with an "inside-out" screen) helped, but it was lacking that special something...something every picture frame should have..ah! A frame! Wanting this project to come out as professionally as possible, I made very careful measurements. Actually, I bought the wood back home, but the computer was still at school. Since the miter saw was also at home, I couldn't wait to get back to school to measure the screen and cut the wood. Behold the power of the interweb! I discovered that my model "laptop" has a 15" diagonal screen. I also knew that the Inspiron 8000 has a 4:3 aspect ratio--that is, the long side and short side are in a 4:3 ratio. Armed with these two facts, mathematics, and
|
|||
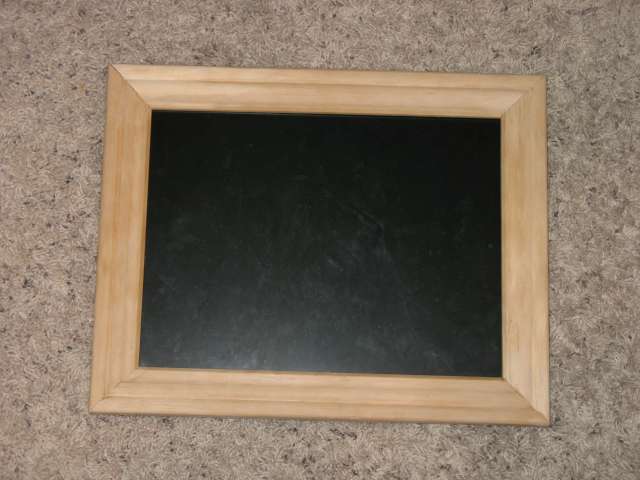
Putting it Together
With the frame built and the computer ready to go, I had to come up with some way to put it all together and attach everything securely. This is the area which I adjusted most as time went on. Initially, I simply used some 5-minute epoxy to secure the frame to the laptop screen. Then, I used hot glue to attach the computer to the screen. This worked well initially, except the hot glue didn't hold for too long. So, I epoxied the computer to the screen as well with some small metal brackets I made. True, this held up quite well--too well in fact. I realized if I ever needed to do repairs, reinstall the CD drives, et cetera, I would have to basically rip apart the pieces and re-glue them when I was done. The best way to attach something to something else is usually a screw. That way, it's a secure connection and it's a removeable one. So, I glued some pieces of wood to the backside of the screen and, using existing holes in the circuit board, screwed the screen to the computer. To attach that whole thing to the frame, I screwed in a piece of wood on top of the computer, sandwiching it between that wood and the frame. Finally, I screwed the computer (again, using existing holes) to the fence around the perimeter of the frame. This turned out very nicely and holds up well. | |||
|
Making it Show PicturesSo, after all that work, I essentially had a very small computer. With no mouse. Or keyboard. What I was basically looking for was a slideshow screensaver which had some specific capabilities: the ability to randomize the photos, a 'fade' transition, and a delay of at least 5 minutes. The slideshow screensaver that comes with Windows XP doesn't have all that functionality. I did some searching online and found a program called gPhotoShow. I set the time before the screensaver starts to its lowest setting, 1 minute. Then I went into the power settings and told the monitor to always stay on, the computer to never sleep, and the hard disk to shut off after the minimum time, 3 minutes. The pictures are set to change every 10 minutes, with each transition being the slick fade option. 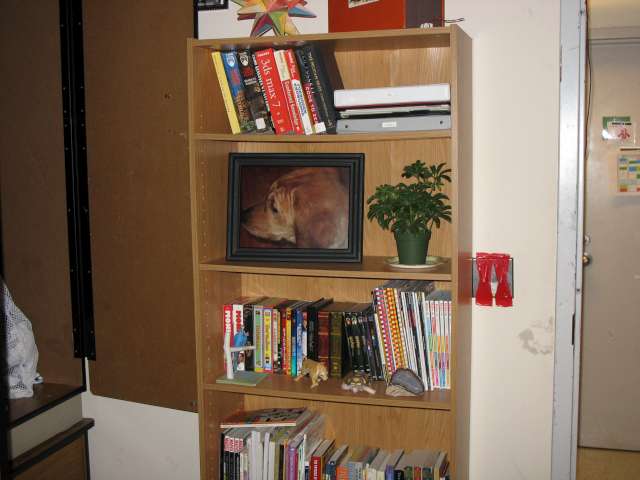
the display on display
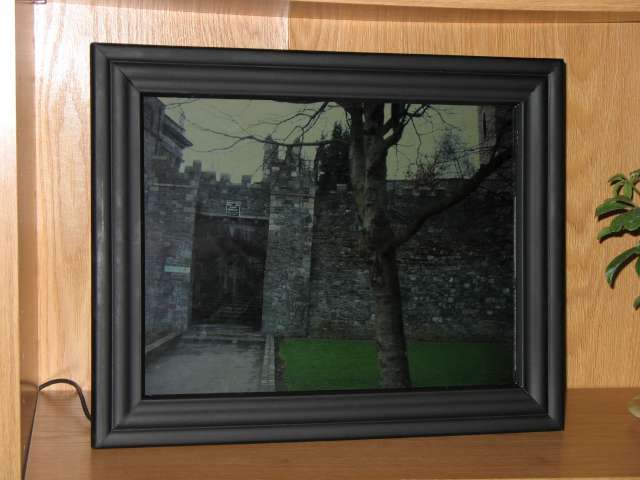
displaying an image
|
|||
| I am extremely happy with the results, except for one thing. At the beginning of this project, the laptop I was using had a "broken" hard drive. After a fresh XP reinstall, the drive seemed to be in working order. However, after completing the frame, the drive got progressively worse and worse until it was limping along worse than a one-legged dog. The end finally came when the frame got unplugged and then would not restart. After some work with the drive (freezing, reinstalling the OS, etc) I could not get it to boot. So, I got my hands on another laptop drive that worked fine. The downfall? With this new drive I went from a whopping 40 gigabytes of photos to a measly 6 possible gigs. Also, something I didn't even think of when I was installing the new drive: since it is so old, when the drive spins up, it sounds something like a 747 taking off next to a lawnmowing convention. Not the quietest thing. At this point, I've got some foam covering the drive which dampens the sound a bit, but I still have to turn the frame off at night. Due to this constant on/off cycle, searching for the old laptop buttons and touching them to the exposed metal contacts just would not do. So, I installed a most professional looking on/off switch: | |||
|
ImprovementsThere are a number of things I hope to change about this frame as time (and money) permits. I'm trying not to purchase too many parts explicitly for this project, as I wanted to keep it as low cost as possible. However, I'm currently on my third LCD ribbon cable, because I foolishly ripped the first one, and the second randomly got a short in it, creating somewhat psychadelic effects.
|