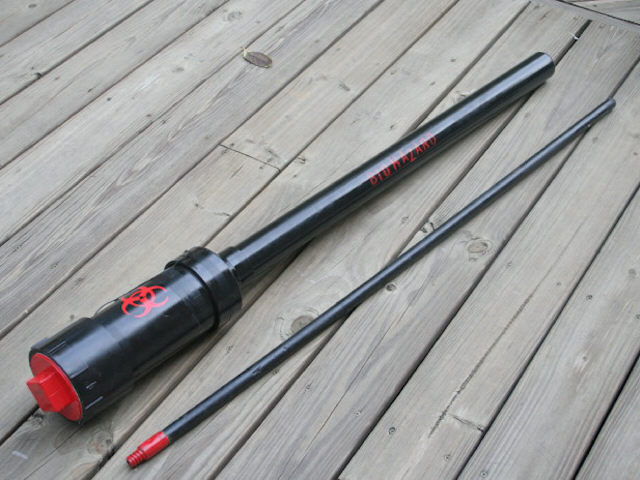
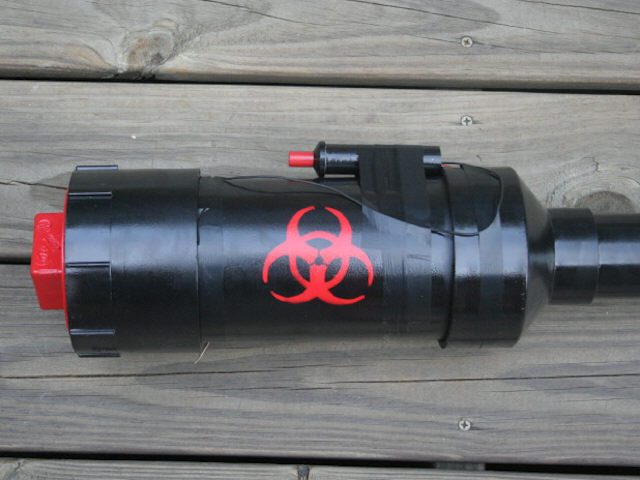
I've seen potato guns before, and tested one for a drafting project my freshman year in high school, but I have never built one. I thought it would be fun-what isn't fun about launching spuds, apples, oranges, and other assorted produce hundreds of yards? It was a really easy build, just a few pieces of PVC thrown together. The only real expense (which was still only about $10) was the grill igniter used to make a spark. Hairspray is sprayed in the 4" chamber for about 3-4 seconds, then the cap is screwed on tight. To fire, you simply push the red button, which creates a spark inside the chamber, igniting the hairspray, which very rapidly removes the potato from the barrel.
Construction
 The
supplies are simple:
The
supplies are simple:
- 37" of 2" PVC
- 10" of 4" PVC
- 2"-4" PVC adapter
- 4" PVC female screw cap adapter
- 4" PVC screw cap
- Grill ignitor
- Two 2.5" screws
- Electrical tape
- PVC primer and cement
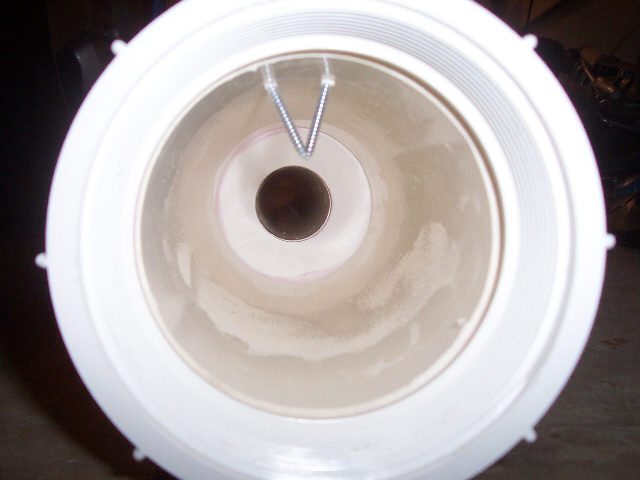
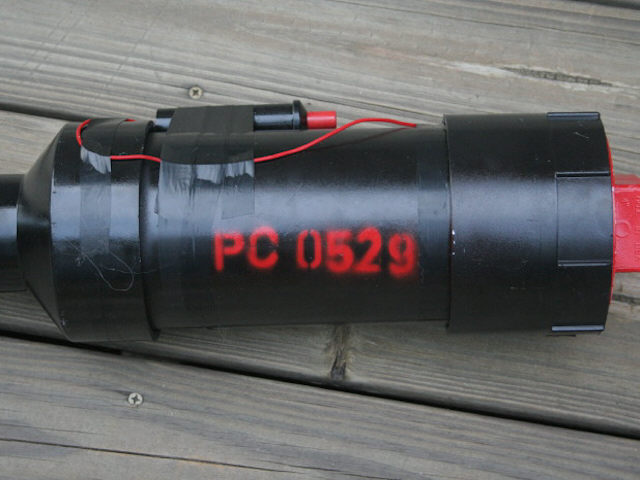
It is highly recommended that you learn how to and practice gluing PVC together, as good seals are needed between adapters. Once all the supplies are ready, you can begin. File down one end of the 2" PVC to make a dull "blade" aiding in cutting down the potato as it is rammed into the barrel. Next, drill two holes 1.5" apart, about 2" away from one end of the 4" PVC pipe at about a 45 degree angle. The screws will screw into these holes, and their tips should nearly touch (1/4"-1/8" gap between their tips). A detail of the screws can be seen to the right (my screws look like they are touching, but they're not, because the gap is made from one being slightly in front of the other). After that, follow the assembly instructions of the grill ignitor to make sure your wires are correct, and attatch them to the screws. Test for a spark. If there isn't one, make the gap between the screw tips a bit smaller. Secure the ignitor and screws with electrical tape. The completed chamber can be seen below. Now, glue the barrel and chamber together with the proper adapter. Finally, glue the screw-thread adapter onto the end of the chamber.
Now, you wait.
It is extremely important to wait at least 24 hours with the screw cap off of the gun before firing. Fumes from the PVC cement need to clear out and dissipate, because they are very flammable. Although flammable is good in the chamber, you cannot control the amount of cement fumes, and therefore, can not control the results.
Here is a cool site that shows you how to build and camouflage paint your potato gun
Firing
Step 1-With the cap off, load a potato into the barrel with a broomstick, using the filed end to cut it down. Don't push the potato further than 2" from the start of the 2"-4" adapter.
Step 2-Have a friend ready to screw on the cap
Step 3-Spray 3-4 seconds of hairspray into the chamber, and have your friend quickly screw it on tight. Not too tight, or it will be hard to get back off. I suggest bringing some pliers just in case. Remember: More hairspray does NOT mean farther launches! It only makes your gun more dangerous.
Step 4-Put the gun on your shoulder, aiming the barrel in a safe direction. Have everyone stand back.
Step 5-Depress the red button, and sssshhhhooooomp! Spuds Away!
Step 6-If your potato does not launch, do NOT look down the barrel. Press the button a few more times, and if there is still no firing, set the gun down, pointing in a safe direction. Unscrew the cap, but don't point the chamber directly towards you. Let the gun sit for at least 7-10 minutes, then test the spark, once again, not pointing the chamber directly at you. If there is no spark, either the grill ignitor is bad, or the screws are to far apart. If there is a spark, you used too much hairspray.
I assume no responsibility for accidents resulting from the construction
of this gun. If all directions are followed, the risk of an accident is
small.