issue 14
I recently got a bike for the purposes of riding around MIT and the Boston area. Seeing as the sun sets around 3 in the afternoon this high in the latitudes, I needed a light for my bicycle. I wanted a nice, long lasting, and high-tech LED light, but I didn't want to shell out 50 bucks for a good one. Also, I really wanted the light to be quite small, taking up as little space on my handlebars as possible. Thus, I turned to my only option--making my own bike light. I did some research online and found out that a lot of people do this, and often have luck with plumbing fixtures as the light housing. With that in mind, I went off to the hardware store and Radio Shack to procure the following items:
Supply List
- 3 white 5mm LEDs (1200 mcd, 20 mA, 3.6 V)
- 1 15 ohm resistor
- 3 (or 4) AAA battery holder
- 3/4" hose adapter
- 1 1/4" hose clamp
- ~1/4" plastic sheet
- small toggle switch
- wire, soldering iron, solder
The LEDs are by far the most expensive part--$5.29 a piece at Radio Shack. So...that means they're actually worth something like 12 cents normally. I would recommend an online dealer or electronics supply, but I wanted to get them quick, and the Shack was nearby. I think, overall, the light cost me around $30, which isn't too bad. I bet it could have been sub-$20 if I got the LEDs from Mouser or something. Now, onto the instructions!
Step 1 - make the housing |
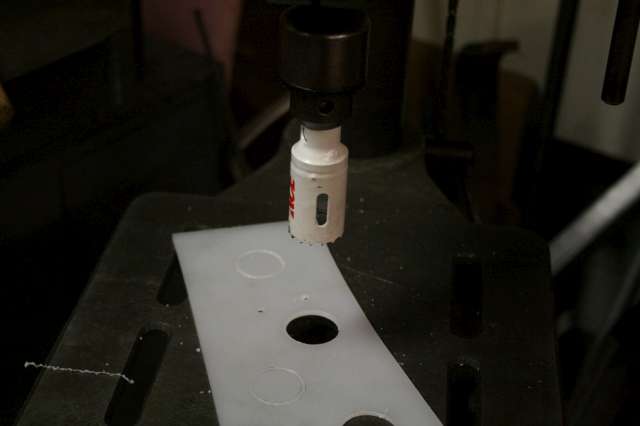
First, you have to create a mount for the 3 LEDs. I chose to use some translucent plastic (about 1/4" thick) that was laying around. Cut out a hole with a drill press and a hole saw that's approximately the same size as your hose adapter's opening (the black rubber side). You may want to cut halfway through the plastic to give an outline, do step 2, and then finish cutting out the piece. It's a lot easier to hold a large sheet of plastic than a 1 1/4" disk under a drill press. Once you do get all the way through the plastic, quickly get the plastic disk out of the hole saw with a flat screwdriver or something like that. It's easiest to get out when the plastic is still soft from the heat of friction. |
Step 2 - drill the holes, finish the housing |
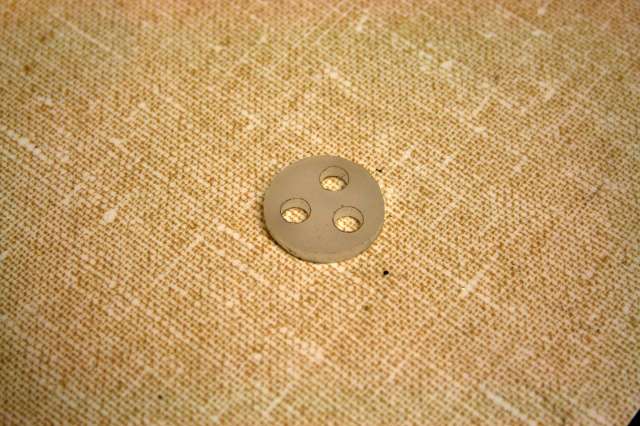
I drilled three 5mm holes in an equilateral triangle pattern, but theoretically, you could do any pattern you wanted, so long as the LEDs fit in. Again, it's best to do this hole-drilling before completely cutting out the disc of plastic. I tested the bit size on a scrap piece of plastic to be sure the LED fit. It should be snug, but easy to get in. After drilling the LED holes, I brought the disk over to a grinder (you can use a file or sandpaper) to make it smaller, as there was no hole saw small enough to make a disk that would fit in the hose adapter. This step not only allows it to fit snugly, but it also makes the edges crisp and clean. |
Step 3 - insert the LEDs |
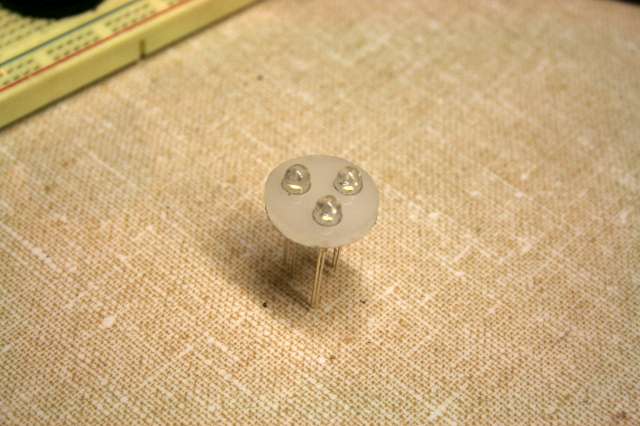
This step is easy: just put a dab of superglue inside each of the holes and insert the LED's one by one, making sure they're all the way in. I tried to arrange the LEDs such that all the short leads were as close together as possible, since I'd be wiring them up in parallel. |
Step 4 - wire the circuit |
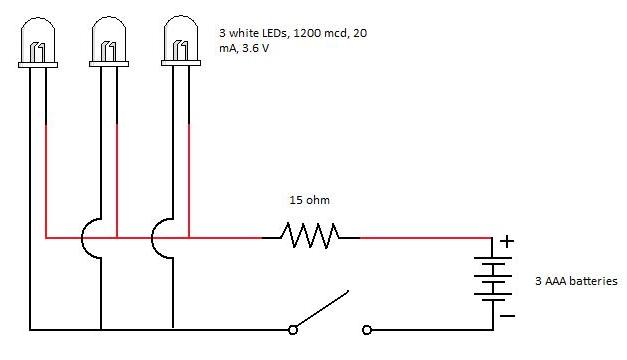
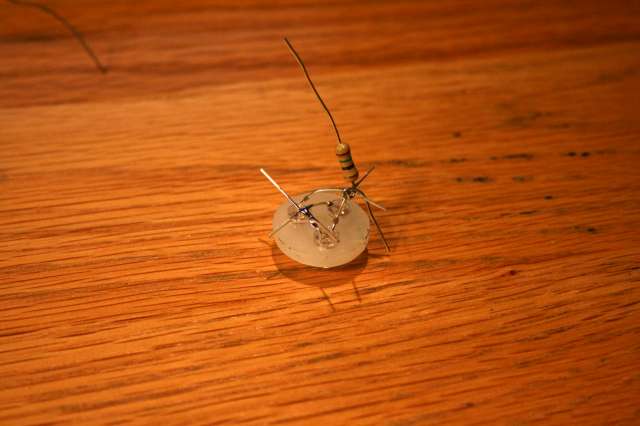
First, let me say that this Instructable helped me out a lot. Second, this formula is important: R = V/(N*I) where V is the voltage difference between the LED's rated voltage and the voltage you will be supplying, N is the number of LEDs and I is the current rating on the LED. Since I was going to be using 3 LEDs and 3 AAAs to power them, my value came out to (4.5-3.6)/(3*.02) = 15 ohms. Thus, I need one 15 ohm resistor in the circuit to keep the LED from burning out. To connect the LEDs, just bend all the short leads together and also bend all the long leads together, being sure there are no short-long leads touching. Then solder the resistor onto either the positive (long) or negative (short) terminals. See the wiring diagram for more detail on the circuit. Below is another image of the wiring, further along in the process. |
Step 5 - add the wire leads |
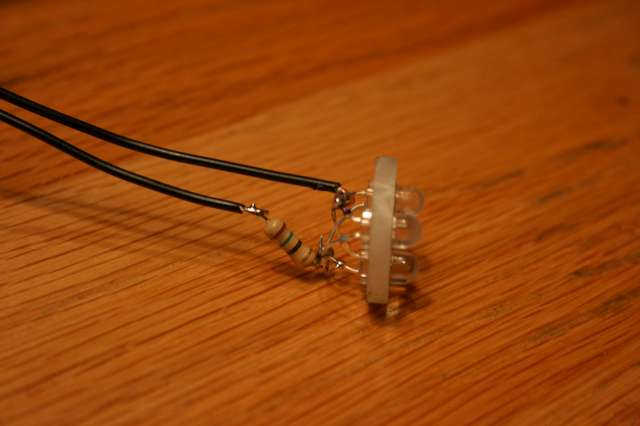
Next you need to add the wires which will eventually connect the light to the on/off switch and the AAA power supply. I chose to use some solid-core wire I had laying around, but you can use whatever you think will work. Basically, one wire gets soldered onto the short (negative) LED leads, and one wire is soldered onto the resistor. It's best to keep the whole affair pretty small, with as short leads as possible so you'll be sure it will fit in the housing at the end. Make a mark on the positive lead so you'll know which one it is when it comes time to connect the battery pack. |
Step 6 - put the light in the housing |
The light should fit snugly in the plumbing hardware, with the wires coming out the threaded hole in the back. You may have to stretch the rubber a little, but if you checked the plastic insert's fit before, in step 2, you know it will fit. Be careful not to break any of the soldered joints or bend any of the leads. I found that no glue was necessary, because the rubber keeps everything where it needs to be. If you have to, I would suggest a thin film of epoxy on the inner surface of the hose adapter to keep the white plastic insert in place. I made a small shim out of some extra rubber that came with the plumbing hardware. That, with some electrical tape wrapped around the wires, made the hole in the back sufficiently small to keep the wires in place (and water/debris out). |
Step 7 - add the switch and batteries |
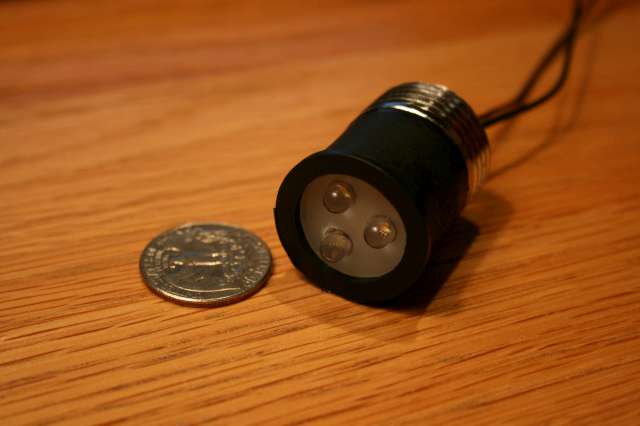
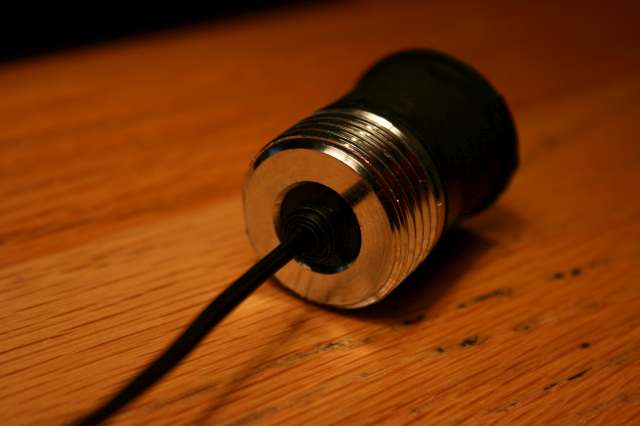
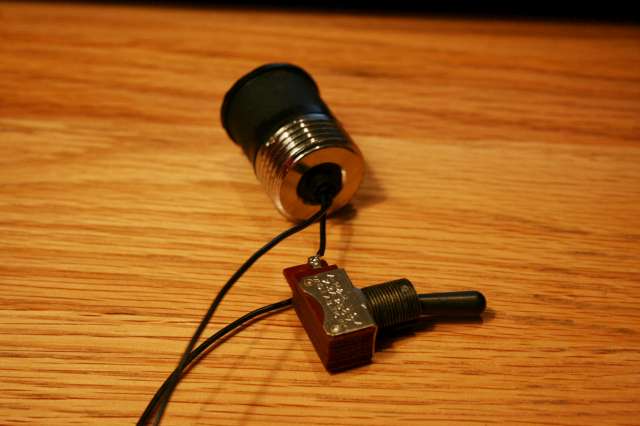
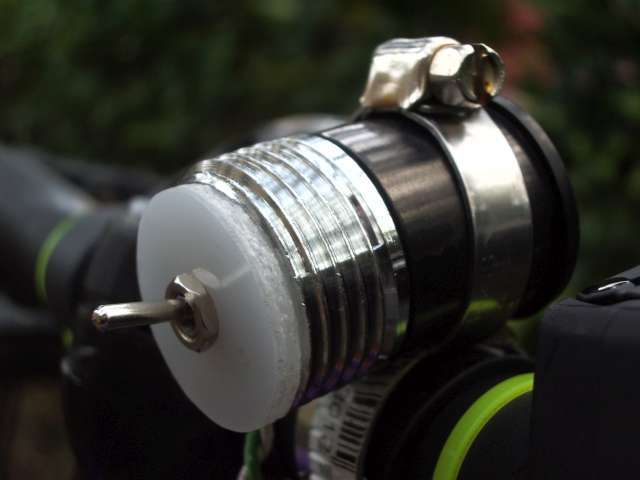
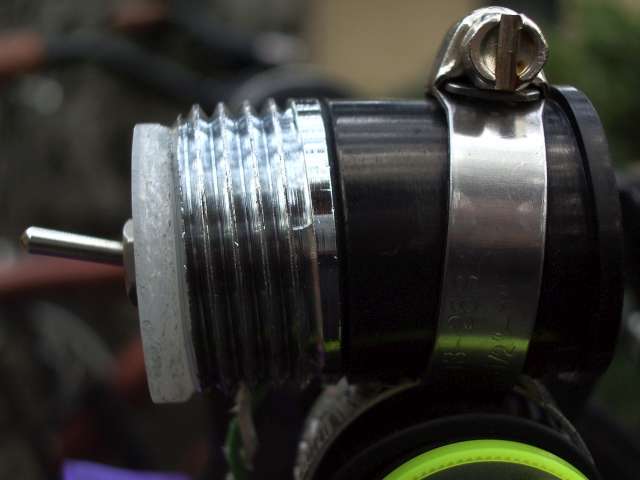
The final step is to connect the switch as shown. Make sure you have enough wire to mount the switch and light on your handlebars. I actually made a second light for my girlfriend, and that one has a bit of a better switch setup. I used a micromini switch and mounted it inside that rear, threaded hole. I routed the two wires out the side of the light, through a hole I drilled in the metal portion. This makes the light a lot more slick, as there's no big switch zip-tied to the handles. Also, you'll want to connect the batteries. Figure out where you want the battery pack to go on your bike, and trim the wires to the right length. Remember to leave enough slack to allow for turning the handles/going around corners. Connect the marked positive wire to the red lead of the pack, and the remaining wire to the only option left. |
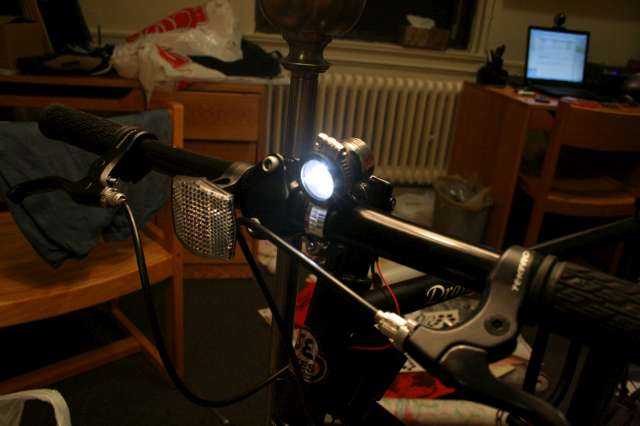
Step 8 - mount the light |
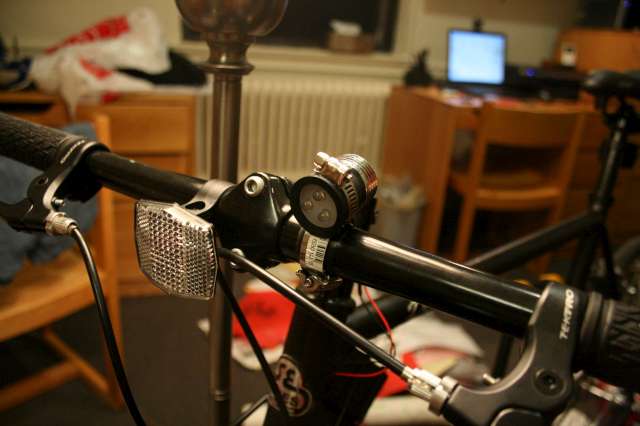
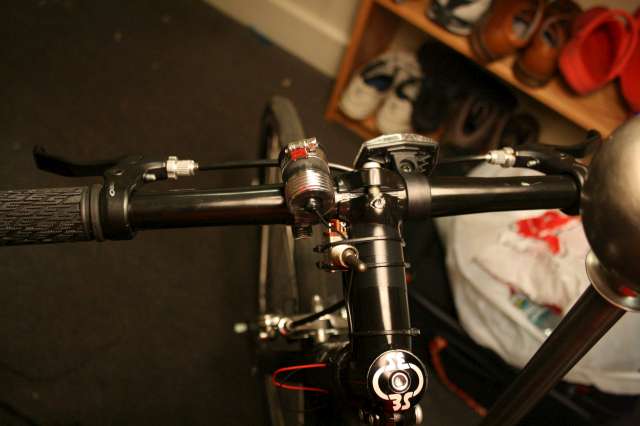
I mounted my light with that hose clamp you see up in the parts list. The hose adapter came with a hose clamp around it, so I added a second one to actually mount it on the handles, as shown in the picture. As for the switch and battery pack, I just used a couple of zip ties. I also tied the wires to the handles to keep them in place. Try to make everything as tight as possible so nothing falls off if you go over a big bump. |
| Update: I made a second light for my girlfriend that has the switch all nice and built in. Here are some pictures: |
|