First off, let me say this was not my idea. I got the idea from Chris Diclerico, then found out UnixMonkey and Drew Perry made very similar battery packs. This portable charger is perfect for camping, road trips, and plane flights, although airport security may not be to happy with a suspiciously disguised box full of wires. It's also great for those, "D'oh! I forgot to charge my iPod, and I gotta leave now!" moments. Drew Perry says you can get about 10 hours worth of play from it, which is a heck of a lot. And now, onto the how-to. Note: I do not know for sure if this battery pack will work with anything other than a 3rd Generation iPod, but it will probably work with an iPod mini.
Concept
This particular type of iPod battery pack supplies about 12 volts. It has two 9V and two AA batteries inside, but the connections aren't typical.
You must be sure you have the positive (red) wire going to pin 1 and the negative (black) wire going to pin 2 of the firewire port. Otherwise, bad things will happen. Deep-fried iPod anyone?
Construction
Materials- One Altoids tin
- Two 9V batteries
- Two "AA" batteries
- One Battery holder for 2 "AA" batteries
- Three 9V snap connectors
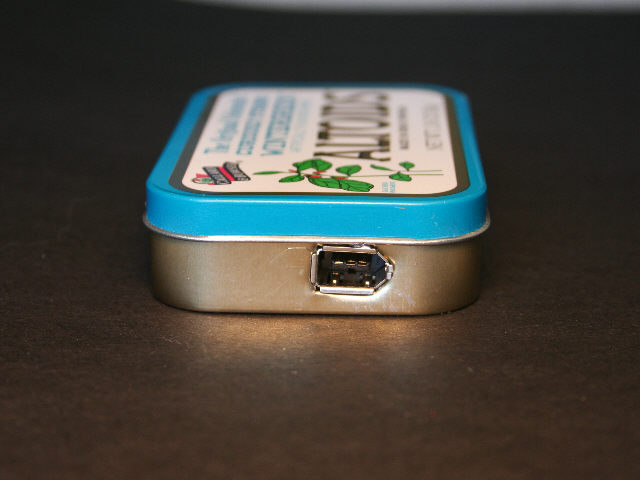
- One Firewire port
- Electrical tape
- Hot-glue gun
- Soldering iron
- Solder
- Dremel tool
- Metal file
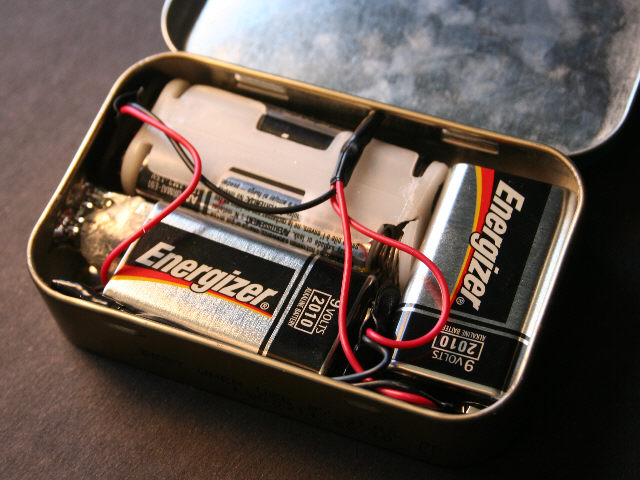 |
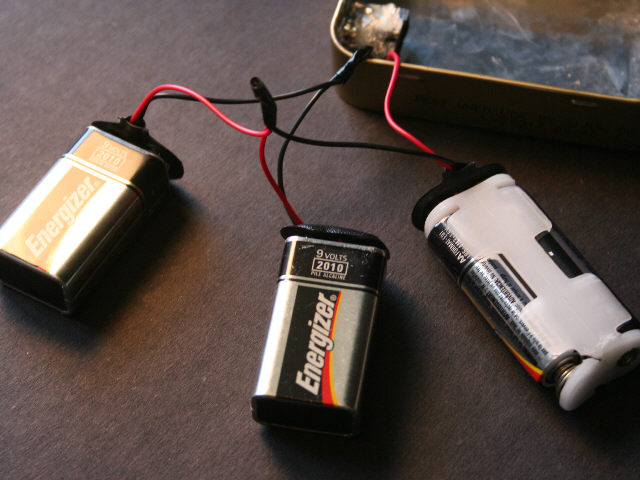
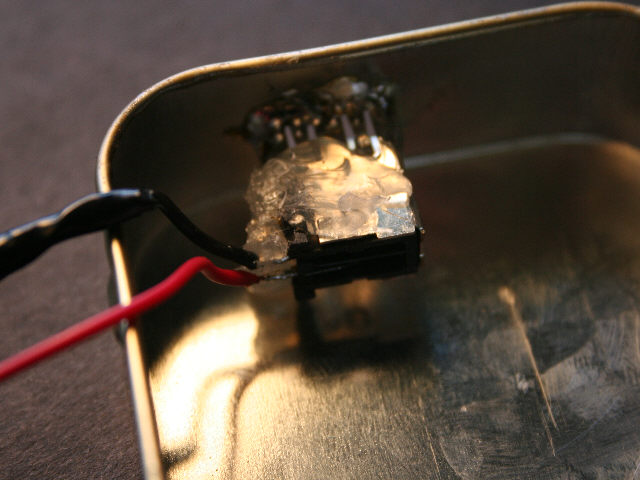
The first step is to put everything in it's place - with no solder or glue yet. The battery arrangement I used is at the left. You can see the firewire port in the lower left corner of the tin. That's where you want your hole. Trace out the firewire shape and cut it out with a Dremel and a metal file. Next, solder the 3 battery connectors together as in the schematic above. You can see a pictorial version to your right. Cover the soldered ends with electrical tape to prevent shorts, and be sure not to connect the batteries yet. At this point, you should have two free wire ends. One red, one black. You see on the port how there's the metal port, and then a black plastic piece with pins sticking out of it? Bend back the 2 metal tabs holding the plastic piece in and pull it out. Now you can put the metal part into the hole you made and solder all around the edges onto the inside of the tin. That baby's not goin anywhere. Going back to the plastic piece, solder the red battery wire to pin 1 and the black one to pin 2 (refer to the schematic). Be extra careful to use only a little bit of solder, because you do not want a solder bridge between pin 1 and 2. Now, insert the plastic piece into the metal bit and fold the little tabs back down. Slather hot glue all over the connections between the firewire pins and the battery wires to be sure they don't break. Finally, connect the batteries, and put them in their places (it may be a tight fit, but they'll go). Close up the tin, and if you have one, use a multimeter (voltage tester) to make sure you have about 12 volts. If not, pray you did everything right, or borrow one from a friend. If it fails the test, go back and un-tape your wire ends, and inspect them. Make sure they are nice and tight, with plenty of solder. Also check the batteries to make sure they even work. If you still can't get it to work, feel free to email me. If everything works fine, connect a firewire to dock connector cable, and hook up your iPod. |
 |